By using this site, you agree to the Privacy Policy and Terms of Use.
Accept

Gadget Issues

Fix Your Gadgets

  • About Us
  • How to Fix
  • Error Fix
  • Tutorial
  • Tech News
Search
© 2022 Foxiz News Network. Ruby Design Company. All Rights Reserved.
Reading: MacBook Pro 15″ Touch Bar (Late 2016) Screen Replacement Guide
Share
Sign In
Notification Show More
Font ResizerAa

Gadget Issues

Fix Your Gadgets

Font ResizerAa
  • About Us
  • How to Fix
  • Error Fix
  • Tutorial
  • Tech News
Search
  • About Us
  • How to Fix
  • Error Fix
  • Tutorial
  • Tech News
Have an existing account? Sign In
Follow US
© 2022 Foxiz News Network. Ruby Design Company. All Rights Reserved.
Gadget Issues > Blog > Tutorial > MacBook Pro 15″ Touch Bar (Late 2016) Screen Replacement Guide
Tutorial

MacBook Pro 15″ Touch Bar (Late 2016) Screen Replacement Guide

Intern
Last updated: March 3, 2025 5:52 am
Intern
Share
3 Min Read
SHARE

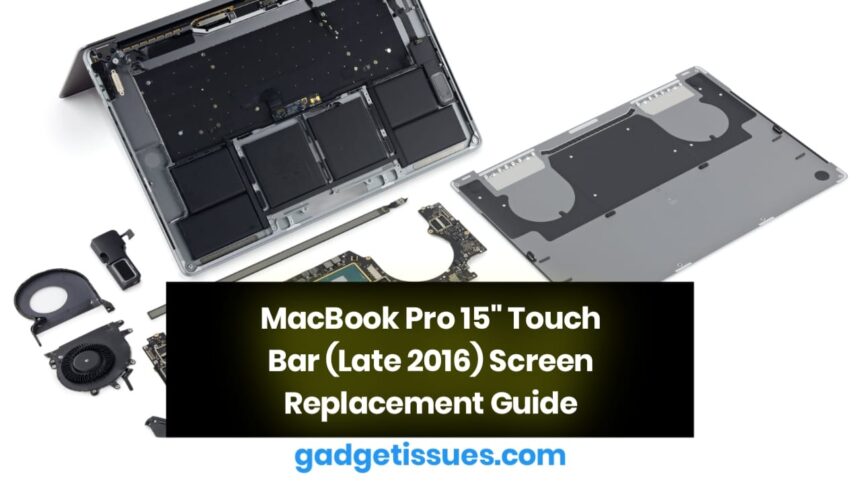
This guide will walk you through the process of replacing the display assembly on your MacBook Pro 15″ Touch Bar (Late 2016). This repair can fix a cracked or faulty screen. The replacement display assembly also includes integrated ribbon cables, which are prone to failure due to the “FlexGate” defect. By replacing the assembly, you can resolve issues such as the “stage lights” effect and screen malfunctions caused by ribbon cable damage.

Contents
Important Safety Information:Required Parts & ToolsPartsToolsStep-by-Step InstructionsStep 1: Disable Auto BootStep 2: Remove the Lower Case ScrewStep 3: Lift the Lower CaseStep 4: Release the Lower Case ClipsNext Steps

Important Safety Information:

  • Before starting, discharge your MacBook Pro’s battery below 25% to minimize the risk of fire in case of accidental battery damage.
  • Follow proper safety precautions when handling sensitive components.

Required Parts & Tools

Parts

  • MacBook Pro 15″ Retina (Late 2016-2017) Display Assembly – $507.99 (Dark Gray, Used B-Stock)

Tools

  • P5 Pentalobe Screwdriver – $5.99
  • P2 Pentalobe Screwdriver (iPhone) – $11.99
  • T3 Torx Screwdriver – $5.99
  • T5 Torx Screwdriver – $5.49
  • TR8 Torx Security Screwdriver – $5.99
  • Suction Handle – $2.99
  • iFixit Opening Picks (Set of 6) – $4.99
  • Spudger – $3.99
  • Tweezers – $4.99

Step-by-Step Instructions

Step 1: Disable Auto Boot

  1. Before beginning, disable your Mac’s Auto Boot feature to prevent accidental power-on during disassembly.
  2. Power on your Mac and open Terminal.
  3. Copy and paste the following command: sudo nvram AutoBoot=%00
  4. Press Enter and input your administrator password if prompted.
  5. Power down your Mac before proceeding.
  6. To re-enable Auto Boot after completing the repair, use: sudo nvram AutoBoot=%03

Step 2: Remove the Lower Case Screw

  1. Completely power off and unplug your MacBook Pro.
  2. Close the display and flip the laptop upside-down.
  3. Use a P5 Pentalobe screwdriver to remove the six screws securing the lower case:
    • Four 4.7 mm screws
    • Two 6.6 mm screws
  4. Note the orientation of the screws, as they need to be reinstalled at a slight angle.

Step 3: Lift the Lower Case

  1. Attach a suction handle near the front edge of the lower case, between the screw holes.
  2. Gently lift the suction handle to create a small gap under the case.

Step 4: Release the Lower Case Clips

  1. Insert the corner of an opening pick into the gap.
  2. Slide the pick around the nearest corner and halfway up the side of the MacBook Pro.
  3. You should hear a clip pop free as you release the hidden securing clips.

Next Steps

Once the lower case is removed, you can proceed with disconnecting internal components and replacing the screen assembly. Follow your device’s manufacturer guidelines for safe and proper installation.

Also Read : 5 Easy Way to fix slow internet speeds: A Comprehensive Guide
You Might Also Like

How to Correctly Clean Corrosion from a MacBook Pro Logic Board

MacBook Air & MacBook Pro Sticky Key Fix

Why Won’t My Lenovo Tablet Turn On? Troubleshooting and Fixes

Best Practices for Cleaning and Maintaining Your USB-C Port

Step-by-Step Guide to Creating a macOS Time Machine Backup

TAGGED:Apple laptop repairApple repair guideLate 2016 MacBook screen replacementMacBook display upgradeMacBook Pro 15 Touch BarMacBook Pro 2016 screen fixMacBook Pro display repairMacBook Pro DIY repairMacBook Pro LCD replacementMacBook Pro screen tutorialMacBook Pro teardownMacBook screen installationMacBook screen replacement guideMacBook screen troubleshootingRetina display replacement
Share This Article
Facebook Twitter Copy Link Print
Share
Previous Article Lenovo ThinkPad P1 Gen 7 LPCAMM2 Memory Replacement Guide
Next Article How to Check and Maintain Your Laptop’s Battery Health

Latest News

How to Fix Scratched Gorilla Glass: A Detailed Guide
How to Fix
How to Fix a Slightly Cracked Screen: A Complete Guide
How to Fix
How to Fix or Replace a Faulty Headphone Jack
How to Fix
Quick Fix: Repairing Broken Plastic on Your Keyboard Edge
How to Fix
//

“Struggling with slow internet or other gadget problems? Our blog offers step-by-step solutions to common tech issues, helping you troubleshoot and resolve problems quickly and efficiently.”

Quick Link

  • Contact Us
  • Privacy Policy
  • Terms and Conditions
  • Cookie Policy
  • Disclaimer

Read Categories

  • Error Fix
  • How to Fix
  • Tech News
  • Technology
  • Tutorial
  • Uncategorized

Find Us on Socials

Follow US
© 2025 Gasgetissues. All Rights Reserved.
Welcome Back!

Sign in to your account


Lost your password?