
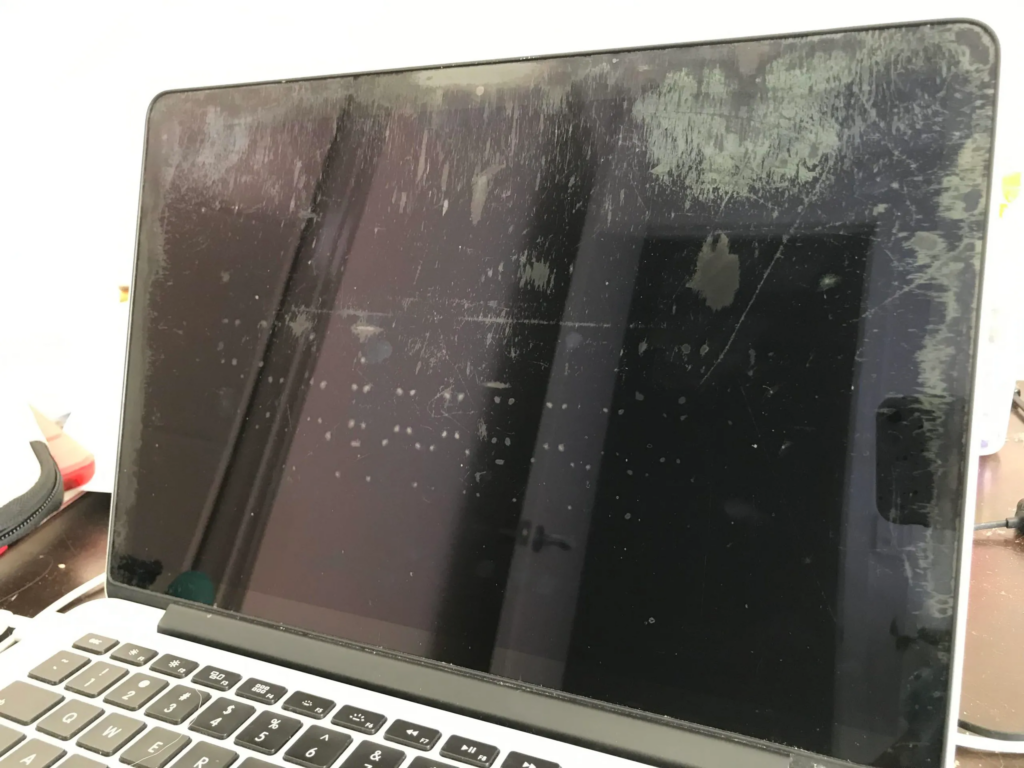
“Staingate” is a common issue affecting MacBook displays, where the anti-reflective coating begins to wear off, leaving unsightly stains and patches. If your MacBook Air or MacBook Pro display is suffering from this issue, follow these steps to restore its appearance. For expert insights on MacBook display problems, visit MacRumors, where professionals discuss Apple product concerns and solutions.
1. Clean the Display Gently
Before attempting any fix, start by cleaning the screen properly to remove dust and smudges.
- Use a microfiber cloth and lightly dampen it with water.
- Gently wipe the affected area in a circular motion.
- Avoid using household cleaners or abrasive materials, as they can worsen the damage.
2. Use Isopropyl Alcohol for Minor Stains
If the anti-reflective coating has just begun to wear off, you can try removing the damaged layer completely.
- Use a soft microfiber cloth dampened with 70% isopropyl alcohol.
- Lightly rub the affected areas to even out the coating.
- Be patient, as it may take several passes to achieve a uniform look.
3. Apply a Protective Screen Cover
To prevent further wear and tear, consider using a screen protector.
- Choose an anti-glare or matte screen protector to minimize reflections and protect against further damage.
- Ensure the protector is properly aligned before applying it.
4. Contact Apple for a Free Repair
Apple has acknowledged “Staingate” as a manufacturing defect and offers free repairs for eligible models.
- Visit the Apple Support website and check if your MacBook qualifies under the Staingate Repair Program.
- If eligible, take your MacBook to an Apple Store or authorized service provider for a free display replacement.
Conclusion
“Staingate” can be an annoying issue, but there are ways to mitigate its effects. Cleaning the display properly, using isopropyl alcohol for minor damage, applying a screen protector, and checking Apple’s repair program can help restore your MacBook screen. If the damage is extensive, seeking professional repair remains the best option to ensure long-term usability.
Also Read : How to Properly Clean and Maintain Your USB-C Port