This guide provides step-by-step instructions for safely removing the motherboard from an Apple Watch SE. Before proceeding, ensure that you have already completed the battery and screen removal steps, as these are prerequisites for accessing internal components. The same set of tools used for those procedures will be required here.
Disclaimer: This teardown guide is for informational purposes and is not a repair manual. If you are looking to repair your Apple Watch SE, refer to an official service manual.
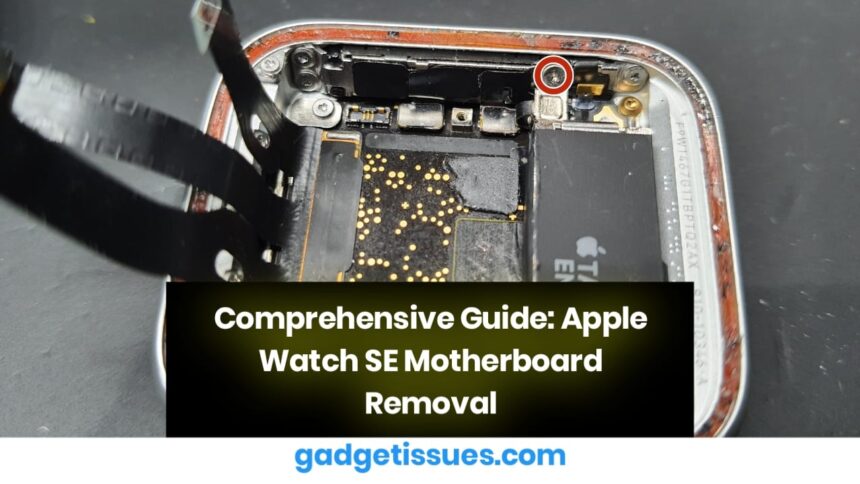
Step 1: Removing the Taptic Engine
- Use a precision screwdriver to remove the designated Tri-screw securing the small protective plate.
- Once the plate is removed, proceed to unscrew the two additional Tri-screws securing the Taptic Engine.
Step 2: Detaching the Taptic Engine
- Locate and disconnect the two connectors highlighted in the guide.
- Gently lift the Taptic Engine out of its position.
- Be mindful of the adhesive securing the Taptic Engine’s cable to the speaker, as this may require careful detachment.
Step 3: Removing the Speaker
- Identify and disconnect the designated speaker connector.
- Remove the three Tri-screws securing the speaker in place.
Step 4: Detaching the Speaker Unit
- Use a pair of precision tweezers to carefully lift the speaker out of the casing.
- The optimal removal point is indicated within the guide, ensuring minimal risk of damage.
Step 5: Removing the Brackets Around the Motherboard
- Unscrew four additional Tri-screws securing the motherboard brackets.
- Gently pull back the screen flex cables to reveal two hidden Tri-screws and remove them.
- Utilize tweezers to extract the brackets carefully.
Step 6: Detaching Brackets Around the Power Button
- Locate and remove the two Tri-screws securing the power button brackets.
- After removing the first bracket, locate the next Tri-screw and extract the second bracket.
Step 7: Disconnecting the Power Button Flex Cable (FPC)
- Carefully disconnect the Power button’s FPC cable.
- Note that this FPC has two connections; avoid applying force in the middle, as this may cause bending or damage.
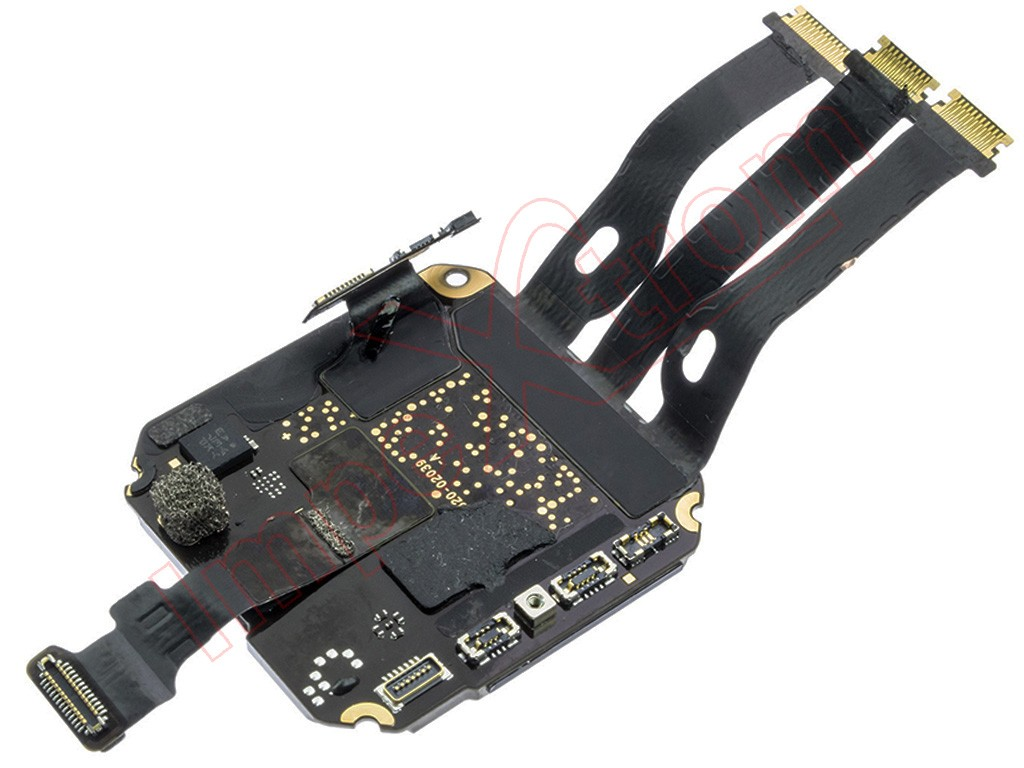
Step 8: Extracting the Motherboard
- Begin in the bottom-right corner and gently wedge a spudger beneath the motherboard.
- Apply light pressure to pry the board upward.
- Once loosened, maneuver the motherboard downwards and to the right in a clockwise motion.
- Perform this step cautiously, as a final connector is still attached underneath the board.
Step 9: Completion
- Once the motherboard is lifted, locate and disconnect the final connector.
- The removal process is now complete.
- To reassemble the device, follow the steps in reverse order, ensuring all connectors, brackets, and screws are securely reinstalled.
Final Note: Proceed with caution during each step to prevent accidental damage to fragile components. If unsure, consult a professional technician or refer to authorized repair services.
Also Read : MacBook Pro 15″ (Early 2011) Teardown & Analysis