By using this site, you agree to the Privacy Policy and Terms of Use.
Accept

Gadget Issues

Fix Your Gadgets

  • About Us
  • How to Fix
  • Error Fix
  • Tutorial
  • Tech News
Search
© 2022 Foxiz News Network. Ruby Design Company. All Rights Reserved.
Reading: How to Fix a Loose or Broken Laptop Hinge at Home: Step-by-Step Guide
Share
Sign In
Notification Show More
Font ResizerAa

Gadget Issues

Fix Your Gadgets

Font ResizerAa
  • About Us
  • How to Fix
  • Error Fix
  • Tutorial
  • Tech News
Search
  • About Us
  • How to Fix
  • Error Fix
  • Tutorial
  • Tech News
Have an existing account? Sign In
Follow US
© 2022 Foxiz News Network. Ruby Design Company. All Rights Reserved.
Gadget Issues > Blog > How to Fix > How to Fix a Loose or Broken Laptop Hinge at Home: Step-by-Step Guide
How to Fix

How to Fix a Loose or Broken Laptop Hinge at Home: Step-by-Step Guide

Intern
Last updated: April 8, 2025 10:13 am
Intern
Share
2 Min Read
SHARE

Laptop hinges often wear out due to regular use, and if not repaired in time, they can damage the screen or motherboard. Whether your hinge is loose, broken, or making noises, here’s a practical guide to fixing it yourself.

Contents
What You’ll NeedStep-by-Step Repair ProcessPro Tips

What You’ll Need

  • Small Phillips screwdriver
  • Plastic prying tool or guitar pick
  • Super glue or epoxy (like Feviquick or Araldite)
  • Small tweezers
  • Replacement hinges (if broken) – optional

Step-by-Step Repair Process

  1. Power Down & Open the Back Panel
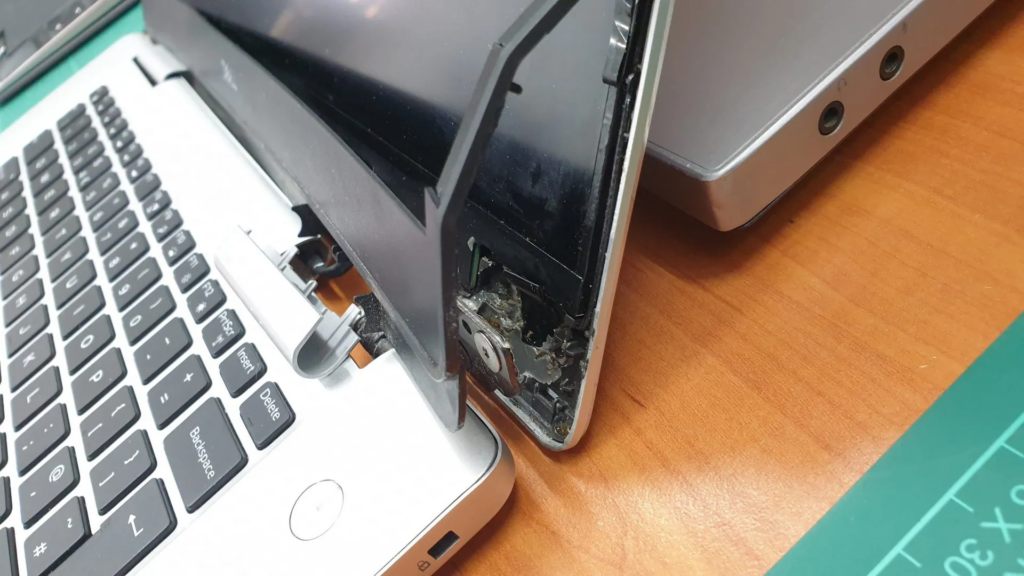
    Shut down the laptop and remove the battery (if removable). Use the screwdriver to remove the back cover near the hinge area.
  2. Inspect the Damage
    Check if the hinge is:
  • Loose: Screws might need tightening.
  • Cracked: Might require glue or a new part.
  • Completely broken: Replace with new hinges.
  1. Tighten or Re-Glue the Hinge
    If screws are loose, gently tighten them. If the plastic mount is broken, use to secure the hinge base to the body. Hold it in place until the glue sets.
  2. Reassemble & Test
    Close the panel and carefully open/close the screen to check movement. Make sure it feels firm but not overly stiff.

Pro Tips

  • Avoid overtightening screws — it may crack the plastic.
  • For visual guidance, follow this laptop hinge repair tutorial.

Also Read : MacBook Pro 15″ Touch Bar (Late 2016) Screen Replacement Guide

You Might Also Like

How to Fix an Apple Watch

How to Replace a MacBook Pro Screen: A Step-by-Step Guide with Care

iPhone 11 Screen Repair How to Fix Common Issues

How to Fix Common Issues on Your iPhone XR

How to Repair Common Phone Issues Without Stress

TAGGED:**How to Fix a Loose or Broken Laptop Hinge at Home: Step-by-Step Guide**Cost-Effective SolutionsDIY Laptop Hinge RepairExtending Your Laptop’s LifespanIdentifying the ProblemPreventing Further DamageStrengthening or Replacing HingesTools and Materials NeededWhen to Seek Professional Help
Share This Article
Facebook Twitter Copy Link Print
Share
Previous Article How to Repair LED Strip Lights
Next Article How to Repair a Frayed Dell AC Adapter Cable Safely at Home

Latest News

Why Your Phone’s Touchscreen Feels Slower in 2025 and How You Can Fix It Fast
How to Fix
Samsung Galaxy Tab S3 Troubleshooting Guide
How to Fix
How to Fix Your Tablet’s Volume Button (Even If You’re Not a Techie)
How to Fix
How to Resolve “Emergency Data Error” on Mobile Phones: An Easy Guide
How to Fix
//

“Struggling with slow internet or other gadget problems? Our blog offers step-by-step solutions to common tech issues, helping you troubleshoot and resolve problems quickly and efficiently.”

Quick Link

  • Contact Us
  • Privacy Policy
  • Terms and Conditions
  • Cookie Policy
  • Disclaimer

Read Categories

  • Error Fix
  • How to Fix
  • Tech News
  • Tutorial

Find Us on Socials

Follow US
© 2025 Gasgetissues. All Rights Reserved.
Welcome Back!

Sign in to your account


Lost your password?