Upgrading or repurposing your Mac’s SSD by installing it into an external enclosure is an effective way to expand storage, back up data, or transfer files between devices. This guide provides a clear, step-by-step process for securely installing a factory-installed Mac SSD into an external enclosure.
Contents
Important Compatibility InformationRequired Tools and ComponentsHardware:Tools:Step-by-Step Installation GuideStep 1: Open the EnclosureStep 2: Insert the SSDStep 3: Secure the SSDStep 4: Reassemble the EnclosureStep 5: Attach the Port CoverStep 6: Secure the EnclosureStep 7: Connect and Use the External SSDFinal Steps: Formatting and Data TransferTroubleshooting Tips:
Important Compatibility Information
Before proceeding, ensure that your SSD and enclosure are compatible:
- This guide applies to factory-installed Mac SSDs from Mid-2013 to Mid-2015 Mac models.
- These enclosures do not support third-party PCIe SSDs such as OWC Aura Pro drives.
Required Tools and Components
Hardware:
- External SSD Enclosure (Designed for select Mid-2013 to Mid-2015 Macs)
- Mac SSD (From a supported MacBook Air or MacBook Pro model)
Tools:
- Phillips #00 Screwdriver
Step-by-Step Installation Guide
Step 1: Open the Enclosure
- Carefully slide the SSD sled out of the metal enclosure.
- Set the enclosure aside for later reassembly.
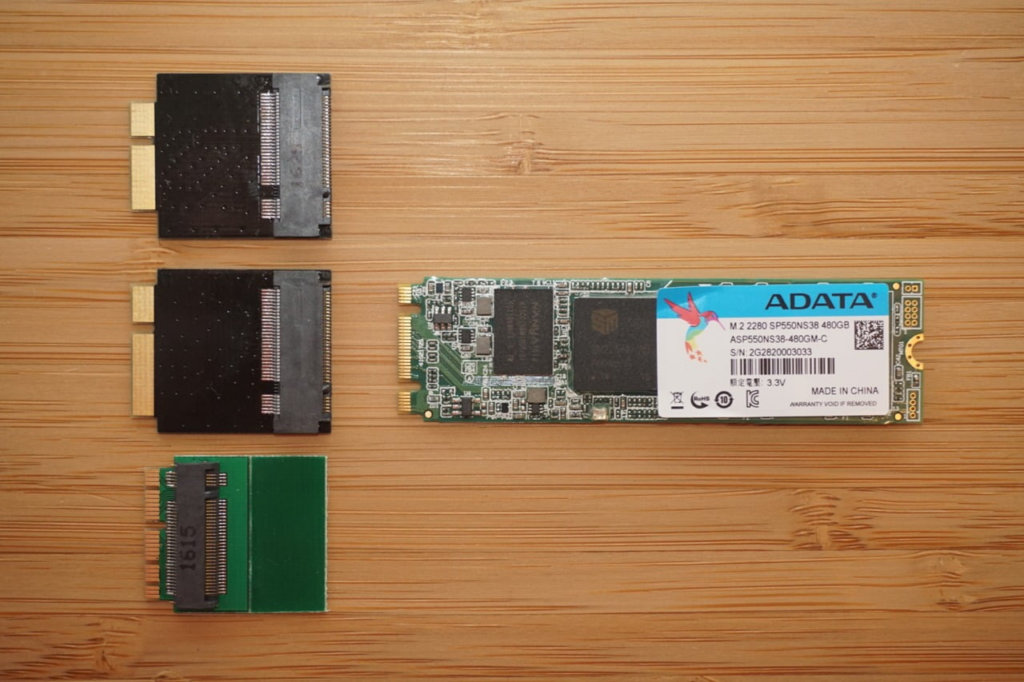
Step 2: Insert the SSD
- Align your Mac OEM SSD with the connector inside the sled.
- The golden contact pads must face upward for correct installation.
- Ensure the SSD is positioned properly before applying any pressure.
- When inserted correctly, the notch at the bottom of the SSD will align with the enclosure’s screw hole.
Step 3: Secure the SSD
- Use a Phillips #00 screwdriver to fasten the 4.5 mm screw, securing the SSD to the sled.
Step 4: Reassemble the Enclosure
- Carefully slide the SSD sled back into the metal enclosure along the designated rails.
- Ensure the USB-C port faces outward once fully inserted.
Step 5: Attach the Port Cover
- Position the port cover plate at the open end of the enclosure, aligning it with the USB-C port.
- Ensure the screw hole chamfers face outward.
Step 6: Secure the Enclosure
- Use the Phillips #00 screwdriver to install the two 8 mm screws at the end of the enclosure.
Step 7: Connect and Use the External SSD
- Plug the SSD into your computer using the provided USB cable.
- If the drive is not immediately recognized, open Disk Utility (Mac) or Disk Management (Windows) to confirm connectivity.
Final Steps: Formatting and Data Transfer
Once installed, the external SSD can be used for:
- File storage and backups
- Time Machine backups on macOS
- Data transfers between multiple devices
Troubleshooting Tips:
- If the SSD is not detected, verify that it is inserted correctly and securely connected.
- Check system compatibility and test the drive on another device if necessary.
Also Read : How to Repair a Broken Laptop Hinge? A Step-by-Step Guide