By using this site, you agree to the Privacy Policy and Terms of Use.
Accept

Gadget Issues

Fix Your Gadgets

  • About Us
  • How to Fix
  • Error Fix
  • Tutorial
  • Tech News
Search
© 2022 Foxiz News Network. Ruby Design Company. All Rights Reserved.
Reading: How to Reliably Fix a Broken Plastic Edge on a Keyboard
Share
Sign In
Notification Show More
Font ResizerAa

Gadget Issues

Fix Your Gadgets

Font ResizerAa
  • About Us
  • How to Fix
  • Error Fix
  • Tutorial
  • Tech News
Search
  • About Us
  • How to Fix
  • Error Fix
  • Tutorial
  • Tech News
Have an existing account? Sign In
Follow US
© 2022 Foxiz News Network. Ruby Design Company. All Rights Reserved.
Gadget Issues > Blog > How to Fix > How to Reliably Fix a Broken Plastic Edge on a Keyboard
How to Fix

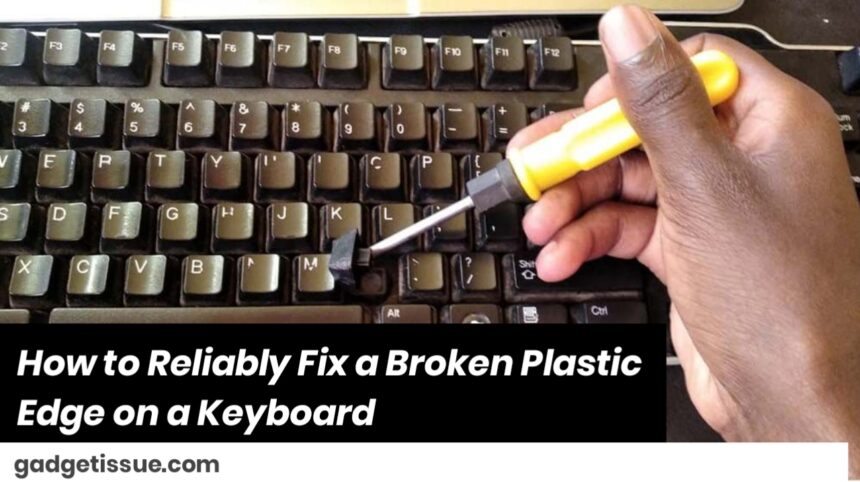
How to Reliably Fix a Broken Plastic Edge on a Keyboard

Intern
Last updated: May 3, 2025 6:49 am
Intern
Share
3 Min Read
SHARE

Tools & Materials Needed:

  • High-quality plastic epoxy or cyanoacrylate (super glue)
  • Baking soda (for reinforcing super glue)
  • Rubbing alcohol or isopropyl cleaner
  • Microfiber cloth
  • Sandpaper (400–600 grit)
  • Clamps or strong rubber bands
  • Black plastic filler, epoxy putty, or electrical tape (for finishing)
  • Precision tools (like tweezers or a plastic scraper)

Step-by-Step Repair Process:

1. Clean the Surface Thoroughly

Use a microfiber cloth with rubbing alcohol to clean all dirt, grease, or oils from the broken edge. Let it dry completely — this ensures maximum adhesive strength.

Contents
Tools & Materials Needed:Step-by-Step Repair Process:1. Clean the Surface Thoroughly2. Align the Broken Pieces3. Apply Glue or Epoxy Carefully4. Clamp or Secure the Joint5. Sand and Smooth the Surface6. Cosmetic Finishing (Optional)Additional Tips for Reliability:

2. Align the Broken Pieces

Check the broken plastic fit by aligning both parts without glue first. If any small shards are loose, remove or reattach them carefully.

3. Apply Glue or Epoxy Carefully

For small clean breaks: Use a small amount of super glue on one surface. For extra strength, sprinkle baking soda over the glue — it instantly hardens and reinforces the bond.
For larger or stressed areas: Use a two-part plastic epoxy. Mix it as directed and apply evenly across the break.

4. Clamp or Secure the Joint

Hold the pieces tightly together using clamps or strong rubber bands. This maintains pressure and alignment as the adhesive cures. Let it sit undisturbed for at least 1 hour, or as per the product instructions (some epoxies need 4–24 hours).

5. Sand and Smooth the Surface

After the adhesive fully cures, gently sand any rough or uneven areas with fine-grit sandpaper. This helps remove excess glue and prepares the area for cosmetic finishing.

6. Cosmetic Finishing (Optional)

Use black epoxy putty, filler, or electrical tape to blend and conceal the repaired area. Let any filler cure before using the keyboard.

Additional Tips for Reliability:

  • Work in a dust-free, dry environment for best results.
  • Avoid applying pressure to the fixed area for 24 hours.
  • If the plastic is load-bearing or supporting a hinge, consider reinforcing the inside with a plastic splint or epoxy reinforcement.

Also Read : MacBook Air & MacBook Pro Sticky Key Fix
You Might Also Like

How to Resolve “Emergency Data Error” on Mobile Phones: An Easy Guide

How to Stop the Clicking Sound When Oscillating: Easy Solutions That Really Work

How to Repair a Water-Damaged Computer: Do’s and Don’ts

Fixing a Broken Computer Display: A Beginner’s Step-by-Step Guide

Cracked Screen on Your 65-Inch Philips TV? Here’s What You Can Do

TAGGED:Broken Keyboard FrameBroken Plastic EdgeComputer Accessory RepairDIY Keyboard FixFix Keyboard EdgeGadget Repair GuideKeyboard Casing RepairKeyboard DIY RepairKeyboard MaintenanceKeyboard RepairPlastic Edge CrackPlastic Repair GuideReliable Plastic RepairRepair Plastic KeyboardTech Fix Tips
Share This Article
Facebook Twitter Copy Link Print
Share
Previous Article How to Repair a Loose USB Port on a Xiaomi Power Bank
Next Article How to Fix “Staingate” on Apple MacBook Displays

Latest News

How to Repair Screen Flickering on Startup: Fast Solutions That Really Work
How to Fix
Complete Guide to Troubleshooting Headphones Charging Problems
How to Fix
How to Repair an Earphone Plug That Won’t Click: Easy Tricks That Work
How to Fix
How to Fix Your TV When It Keeps Turning On and Off
How to Fix
//

“Struggling with slow internet or other gadget problems? Our blog offers step-by-step solutions to common tech issues, helping you troubleshoot and resolve problems quickly and efficiently.”

Quick Link

  • Contact Us
  • Privacy Policy
  • Terms and Conditions
  • Cookie Policy
  • Disclaimer

Read Categories

  • Error Fix
  • How to Fix
  • Tech News
  • Tutorial

Find Us on Socials

Follow US
© 2025 Gasgetissues. All Rights Reserved.
Welcome Back!

Sign in to your account


Lost your password?