A laptop hinge is a vital element that keeps the screen at the right angle. It guarantees protection, flexibility, and seamless connectivity. Hinges may get damaged quickly as the laptop ages, causing troubles. If you try to DIY, this may be tough to fix, but repair technicians at centers like can do it for you in minimal time.
What Causes Laptop Hinge Damage?
Knowing why hinges break down can help avoid this issue in the future. Common causes include:
- Constantly gliding and closing the lid of the laptop.
- Excessive pressure or laptop slipping out of our hands.
- Weak construction of the hinge mechanism.
- Deterioration as a result of continual usage over time.
11 Steps to Fix a Broken Laptop Hinge
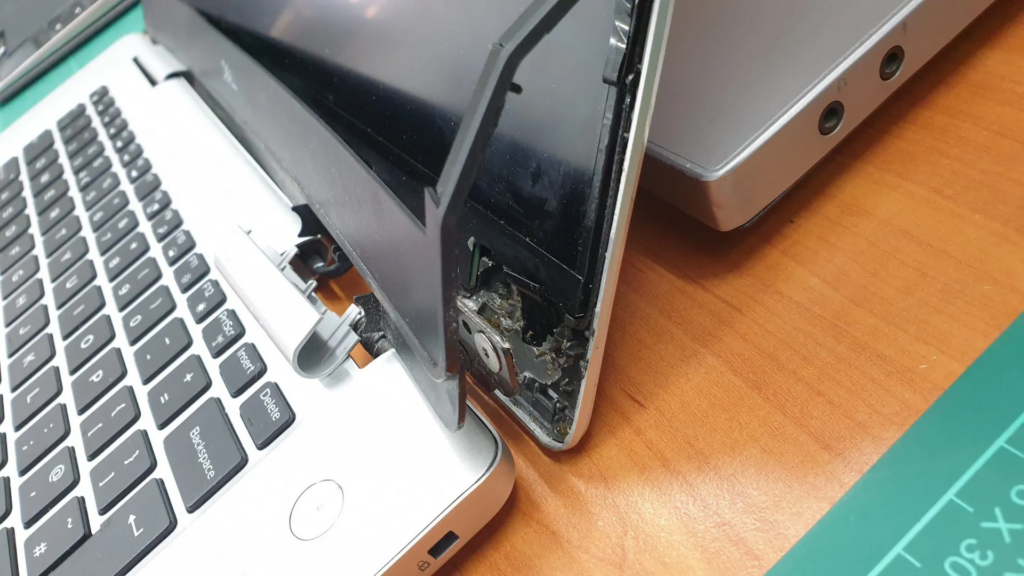
The laptop hinge is an essential part of the laptop subjected to irreparable damage. Continuous stress can cause this. A broken hinge will cause problems with the screen’s firmness, resulting in an unstable and unusable laptop. Here’s a detailed guide on laptop hinge repair step-by-step:
1. Gather All the Required Tools
Before repairing your laptop hinge, ensure you have the necessary tools and equipment:
- Small screwdriver set
- Replacement hinge
- Tweezers
- Clean cloth or paper towels
- Isopropyl alcohol
- Anti-static wrist strap
These will help to make repairs quickly and without any difficulties or hindrances.
2. Shutdown and Unplug the Laptop
Shut down your laptop and unplug it from the power source. This is important for your safety and to avoid any possible damage to electrical outlets during the repair process.
3. Remove the Battery Before Repair
To protect yourself from electric shock or short circuits, remove the laptop’s battery if it is easily removable. This is a necessary step when dealing with the inside of your laptop.
4. Unscrew the Back Lid of the Laptop
- Use a suitable screwdriver.
- Carefully remove the back cover of the laptop.
- Keep the screws organized and in a safe place to prevent losing them.
5. Take off the Top Cover and Keyboard
- After removing the back lid, unscrew the cover and keyboard to remove them.
- Be very careful.
- You can also consult your laptop’s manual to understand how to remove these components correctly.
6. Remove the Laptop Motherboard
- The motherboard removal method will vary depending on the model of your laptop.
- When handling the motherboard, be gentle and double-check that every connection has been disconnected.
- Carefully unscrew the motherboard and set it aside.
- You can also seek out help from professionals like for proper repair.
7. Properly Clean Your Laptop
Cleaning the internal parts of a laptop is vital to remove dust and debris that can accumulate over time. Use a clean and dry cloth, cotton swab, or a compressed air blower before fixing the cracked laptop screen and broken hinge.
8. Unscrew the Old Hinge
- Find the damaged hinge and carefully unscrew it from the laptop casing.
- Make a note of the screws and the other components connected to the hinge.
9. Install a New Hinge on the Laptop
- Place the new hinge in the socket of the older one.
- Properly align it with the mounting points.
- Tightly screw the new hinge back in place.
10. Reassemble Your Laptop Back
Carefully put the laptop back together, following the opposite steps of disassembly:
- Assemble the motherboard.
- Then, the top cover.
- Place back the keyboard.
- Finally, secure the back cover.
- Verify that all connectors and fasteners are correctly connected and secure.
11. Wipe the Laptop Thoroughly
Once you finish assembling all parts, wipe off dust from exterior surfaces with a dry cloth and isopropyl alcohol. This will help eliminate fingerprints and residues and enhance your laptop’s aesthetic value.
Conclusion
Learning to fix a broken laptop hinge requires patience and attention to detail. By following these steps and using the right tools, you can successfully repair your laptop hinge. If you’re unsure about the repair process.
Also Read : How to Minimize the Appearance of Cracks on Your Phone Screen