This guide will walk you through the process of replacing the display assembly on your MacBook Pro 15″ Touch Bar (Late 2016). This repair can fix a cracked or faulty screen. The replacement display assembly also includes integrated ribbon cables, which are prone to failure due to the “FlexGate” defect. By replacing the assembly, you can resolve issues such as the “stage lights” effect and screen malfunctions caused by ribbon cable damage.
Contents
Important Safety Information:
- Before starting, discharge your MacBook Pro’s battery below 25% to minimize the risk of fire in case of accidental battery damage.
- Follow proper safety precautions when handling sensitive components.
Required Parts & Tools
Parts
- MacBook Pro 15″ Retina (Late 2016-2017) Display Assembly – $507.99 (Dark Gray, Used B-Stock)
Tools
- P5 Pentalobe Screwdriver – $5.99
- P2 Pentalobe Screwdriver (iPhone) – $11.99
- T3 Torx Screwdriver – $5.99
- T5 Torx Screwdriver – $5.49
- TR8 Torx Security Screwdriver – $5.99
- Suction Handle – $2.99
- iFixit Opening Picks (Set of 6) – $4.99
- Spudger – $3.99
- Tweezers – $4.99
Step-by-Step Instructions
Step 1: Disable Auto Boot
- Before beginning, disable your Mac’s Auto Boot feature to prevent accidental power-on during disassembly.
- Power on your Mac and open Terminal.
- Copy and paste the following command:
sudo nvram AutoBoot=%00 - Press Enter and input your administrator password if prompted.
- Power down your Mac before proceeding.
- To re-enable Auto Boot after completing the repair, use:
sudo nvram AutoBoot=%03
Step 2: Remove the Lower Case Screw
- Completely power off and unplug your MacBook Pro.
- Close the display and flip the laptop upside-down.
- Use a P5 Pentalobe screwdriver to remove the six screws securing the lower case:
- Four 4.7 mm screws
- Two 6.6 mm screws
- Note the orientation of the screws, as they need to be reinstalled at a slight angle.
Step 3: Lift the Lower Case
- Attach a suction handle near the front edge of the lower case, between the screw holes.
- Gently lift the suction handle to create a small gap under the case.
Step 4: Release the Lower Case Clips
- Insert the corner of an opening pick into the gap.
- Slide the pick around the nearest corner and halfway up the side of the MacBook Pro.
- You should hear a clip pop free as you release the hidden securing clips.
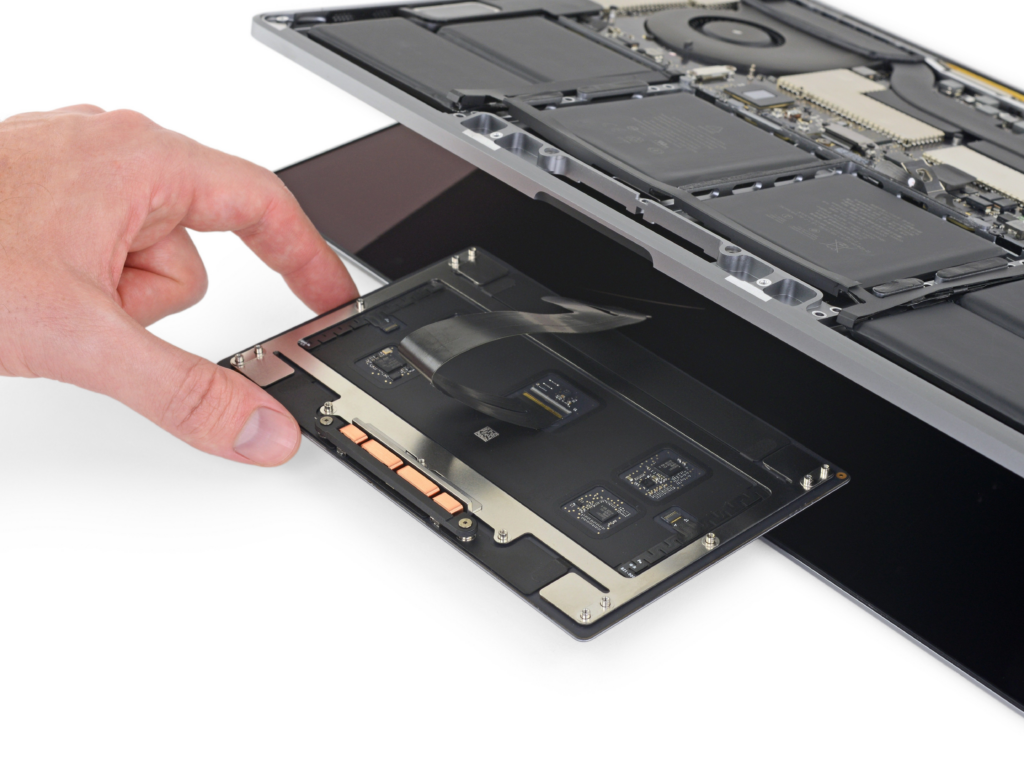
Next Steps
Once the lower case is removed, you can proceed with disconnecting internal components and replacing the screen assembly. Follow your device’s manufacturer guidelines for safe and proper installation.
Also Read : 5 Easy Way to fix slow internet speeds: A Comprehensive Guide