Removing keycaps from a MacBook keyboard is a delicate process that requires precision and patience. Whether you’re cleaning beneath the keys, replacing a malfunctioning key, or performing maintenance, understanding the correct procedure is crucial. Unlike external mechanical keyboards, MacBook keyboards have a more fragile structure, and improper removal can damage the scissor-switch or butterfly mechanism.
Precautions Before Removing Keycaps
Before proceeding, follow these essential precautions:
- Power off your MacBook and disconnect it from any power source to prevent accidental inputs.
- Wash your hands to avoid transferring dirt and oils onto the keyboard.
- Use proper tools, such as a plastic spudger, a keycap puller, or a thin plastic card. Avoid metal tools, as they can scratch or damage the keys.
- Work in a clean, dust-free environment to prevent debris from entering the keyboard mechanism.
- Be extremely gentle—unlike mechanical keyboards, MacBook keycaps and their underlying mechanisms are much more delicate.
Understanding Your MacBook Keyboard Type
MacBooks use two types of keyboard mechanisms:
- Scissor-Switch Keyboard (Pre-2015 & Post-2020 MacBooks)
- This design features two interlocking plastic pieces that stabilize the keycap.
- Common in MacBook models before 2015 and after 2020 (MacBook Air M1, MacBook Pro 14”/16”).
- Easier to remove and reattach compared to butterfly switches.
- Butterfly Keyboard (2015-2019 MacBooks)
- This ultra-thin keyboard design has a more delicate hinge-like mechanism.
- Found in MacBook models from 2015 to 2019 (MacBook Pro with Touch Bar, MacBook 12”).
- More fragile and prone to damage if not handled properly.
Step-by-Step Guide to Removing Keycaps from a MacBook
Step 1: Identify the Key and Its Stability
Not all keys are removed in the same way. Larger keys (like the spacebar, shift, return, and delete) have additional stabilizers, making them harder to remove. Start with a smaller key (e.g., an arrow key) before attempting larger ones.
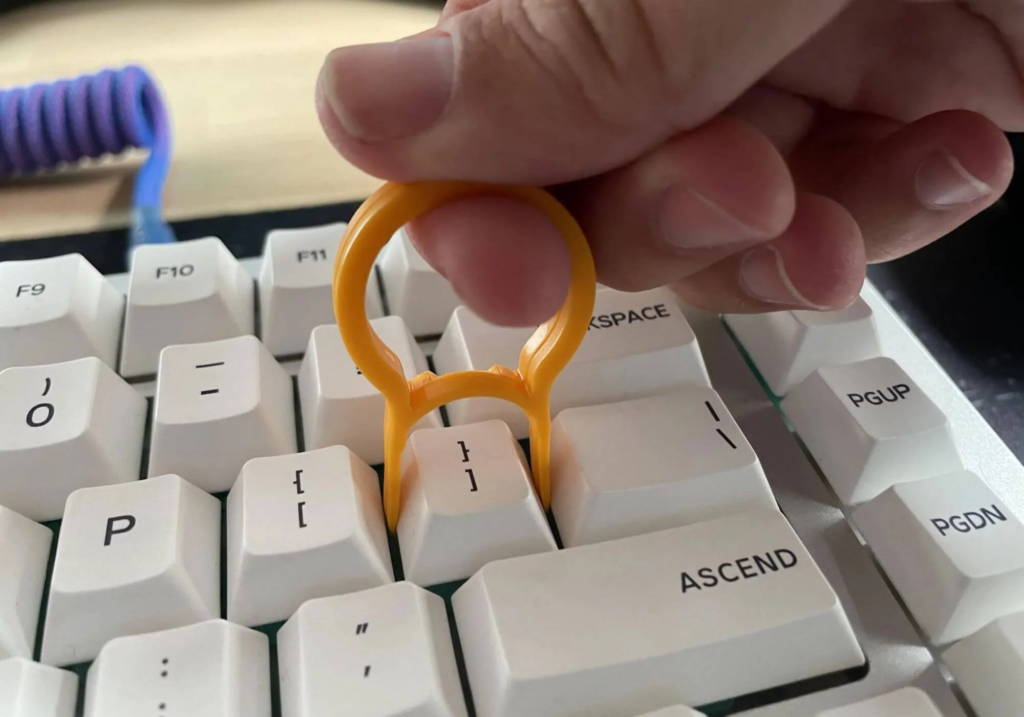
Step 2: Insert a Plastic Tool Under the Keycap
Gently slide a plastic spudger or thin plastic card under one corner of the keycap.
For butterfly keyboards, insert the tool from the top edge and apply gentle upward pressure.
For scissor-switch keyboards, lift the keycap from the side, as scissor mechanisms are more flexible.
Step 3: Apply Gentle Pressure to Pop the Keycap Off
- Slowly and carefully pry up the keycap while applying minimal force.
- The key should slightly lift without resistance. If it feels stuck, stop and try another angle to avoid breaking the delicate hinge.
- For larger keys (spacebar, shift, enter), be extra careful as they have stabilizer bars that can easily bend or break.
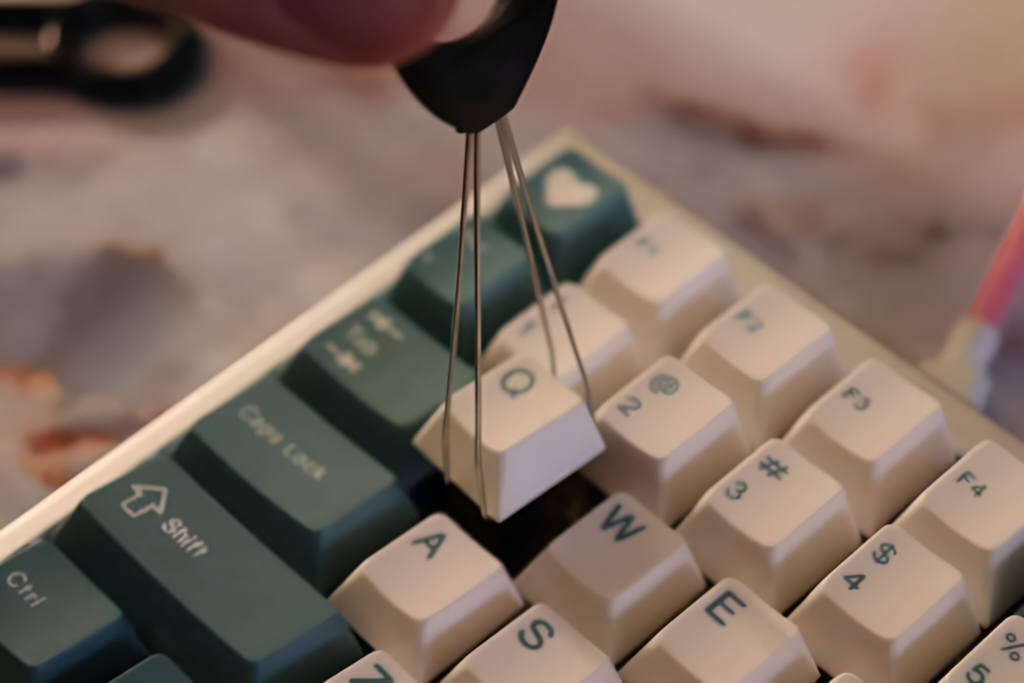
Step 4: Remove the Keycap Completely
Once one side is loose, gently wiggle the keycap side to side until it detaches completely. Never forcefully pull the key off, as the fragile hinges can snap.
Cleaning Underneath the Keycap
Once the keycap is removed, you’ll see dust, dirt, or debris that may have been affecting the key’s performance.
- Use compressed air to blow away dust and dirt.
- For sticky residue, gently wipe with a microfiber cloth dampened with isopropyl alcohol (90% or higher). Avoid excess liquid.
- If any key stabilizer clips come loose, carefully reposition them before reattaching the keycap.
How to Reattach a MacBook Keycap
- Align the keycap over the scissor or butterfly mechanism. Ensure it’s properly positioned before pressing down.
- Gently press down on the center of the keycap until you hear a soft click, indicating that it’s securely in place.
- Test the key by pressing it multiple times to check for smooth movement and responsiveness.
- If the key feels loose or uneven, remove and reattach it carefully to ensure the mechanism is correctly aligned.
When to Seek Professional Help
If you experience any of the following issues while removing or reattaching keycaps, consider visiting Apple Support or an Apple-authorized repair center:
- The keycap snaps or doesn’t click back into place.
- The scissor or butterfly mechanism is broken or missing.
- The key is unresponsive even after cleaning.
- You accidentally damage the stabilizers or clips while removing the key.
Apple keyboards are not designed for frequent key removal, so if you’re unsure, it’s best to get professional assistance rather than risk damaging your keyboard.
Conclusion
Removing and reattaching MacBook keycaps requires patience and precision. By following this step-by-step guide, you can safely remove keycaps for cleaning or repairs without damaging the delicate scissor or butterfly mechanisms. Always use plastic tools, avoid excessive force, and test your keys after reattaching them to ensure smooth operation.
Also Read : How to Reset a Forgotten Password on a Mac