A damaged charger cord can be inconvenient and potentially dangerous if not handled correctly. Frayed wires, loose connections, or bent tips are common issues that can affect the charging efficiency of your devices. While replacing the cord is ideal, a careful DIY repair can offer a temporary or long-term solution if done properly.
Safety First
Before attempting any repair, unplug the charger from the power source and device. Ensure there is no current running through the wire to avoid shock or further damage.
Materials You’ll Need
- Electrical tape or heat shrink tubing
- Wire cutter/stripper
- Soldering kit (optional, for a stronger fix)
- Multimeter (to test continuity)
Step 1: Inspect the Damage
Identify the damaged section of the cord. If the insulation is cracked or wires are exposed near the connector or mid-cable, mark the spot. If the internal wires are broken, you may need to cut and reconnect them.
Step 2: Trim and Strip the Wire
Cut out the damaged section of the cable using a wire cutter. Strip about one inch of the outer insulation from both ends of the remaining cord. Then, strip a small amount of insulation off each internal wire.
Step 3: Reconnect the Wires
Twist matching colored wires from both ends together. For a more secure and long-lasting repair, solder the connections. If soldering isn’t available, make sure the wires are tightly twisted and secure.
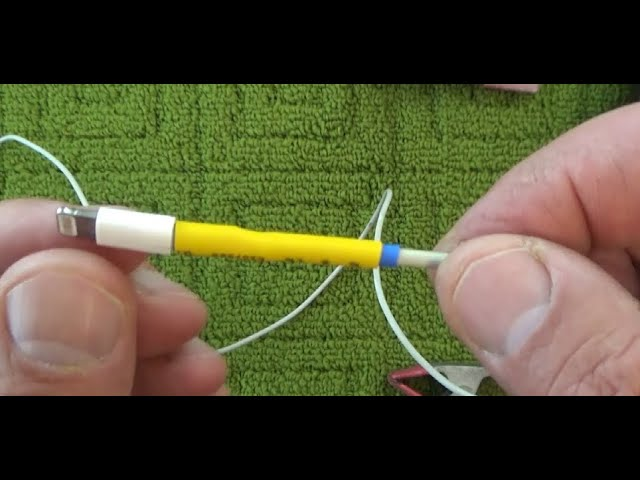
Step 4: Insulate and Seal
Wrap each wire separately with electrical tape to prevent short circuits. Then wrap the entire cable section with electrical tape or slide heat shrink tubing over the area and use a heat gun to seal it tightly.
Step 5: Test the Charger
Use a multimeter to ensure proper continuity through the cable. Plug it into your device to confirm that it is charging correctly and safely.
Conclusion
Repairing a charger cord requires attention to detail and safety precautions. While it’s a cost-effective alternative to replacement, always consider whether it’s safer and more practical to invest in a new certified charger. For critical or expensive devices, using a factory-recommended cable is the most reliable option.
Also Read : Complete Guide to Repairing Your iPhone 15: Fix Common Issues Yourself