A damaged headphone jack can cause audio issues, such as static noise, one-sided sound, or complete disconnection. Instead of replacing your headphones or device, you can try fixing or replacing the jack with the following steps.
1. Clean the Headphone Jack
Dirt and debris inside the headphone jack can interfere with the connection.
- Use a flashlight to inspect the port for dust or lint.
- Clean the jack using a compressed air duster.
- If debris is stuck inside, gently remove it with a toothpick or cotton swab dipped in isopropyl alcohol.
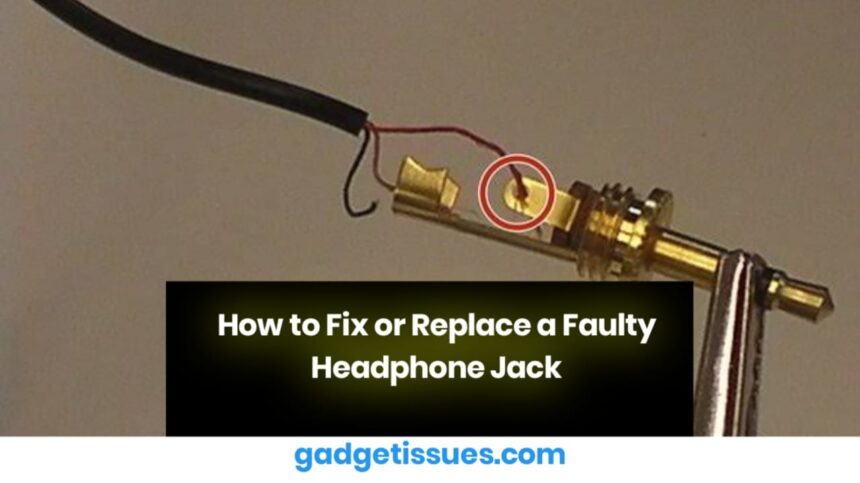
2. Check for Loose Connections
Sometimes, the headphone jack may become loose due to wear and tear.
- If the jack wiggles excessively, it might need to be resoldered.
- Open the device carefully using a pry tool kit.
- Locate the headphone jack and check for any disconnected wires.
- Resolder loose connections carefully to restore audio output.
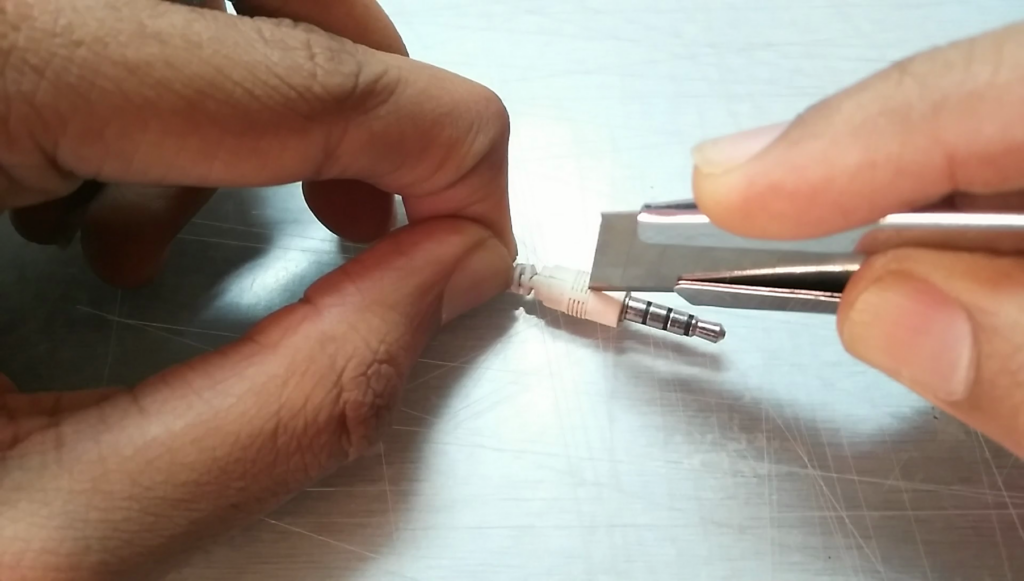
3. Replace the Headphone Jack
If the jack is physically damaged, replacing it might be the best solution.
- Purchase a compatible replacement headphone jack for your device.
- Desolder the faulty jack using a soldering kit.
- Install the new jack and ensure all connections are secure before reassembling the device.
4. Test the New Headphone Jack
Once the repair is complete:
- Plug in your headphones and test audio output on different applications.
- If the issue persists, check your device’s audio settings and try another pair of headphones.
- If needed, visit Sony support for troubleshooting assistance.
Final Thoughts
Fixing or replacing a faulty headphone jack can save you money and extend the life of your device. However, if you’re unsure about opening your device or soldering, seeking professional repair services is recommended.
Also Read : Complete Troubleshooting Guide: Fixing Issues with HyperX Cloud Alpha Headset


