Apple’s MacBook Pro 15″ (Early 2011) introduced significant hardware improvements, including the first quad-core processor in a MacBook and the Thunderbolt port. This teardown provides a detailed analysis of its internal components, performance enhancements, and overall repairability.
Contents
Design & Build
- The model number (A1286) remains unchanged since 2008.
- The unibody aluminum design ensures durability while allowing access to internal components.
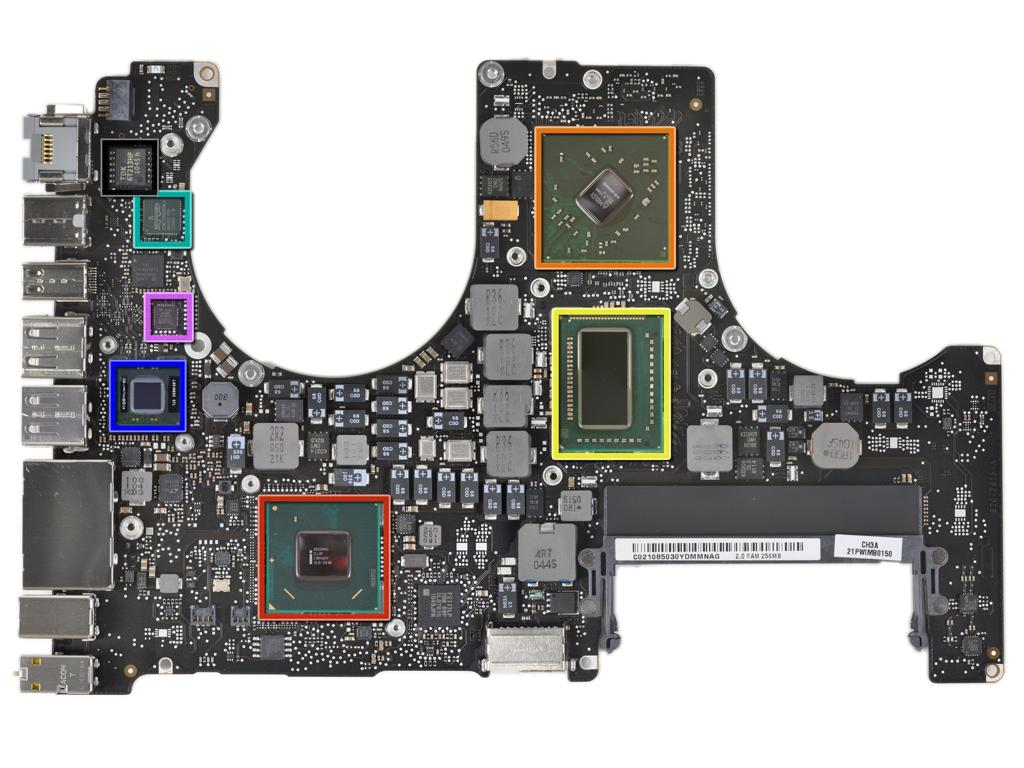
Performance Upgrades
- Powered by Intel’s Core i7 quad-core processor, delivering a notable performance boost.
- Features the AMD Radeon HD 6490M GPU, enhancing graphics capabilities.
- The introduction of Thunderbolt enables high-speed data transfers up to 10 Gbps.
Battery & Repairability
- Equipped with a 77.5Wh battery, with Apple claiming a 7-hour backup under optimal conditions.
- The battery is secured with Tri-Wing screws, making user replacement difficult without specialized tools.
Thermal Management
- A large primary heat sink, supplemented by two smaller ones, is used for cooling.
- The application of thermal paste is excessive, which may contribute to long-term overheating issues.
Connectivity & Wireless
- The Broadcom BCM4331 chip improves Wi-Fi performance.
- Bluetooth 3.0 with a dedicated antenna enhances wireless connectivity.
Repairability Score: 7/10
- Pros:
- Easy access to internal components.
- Modular design for storage and RAM upgrades.
- Cons:
- Battery replacement requires specialized tools.
- Display and LCD repairs are complex due to the integrated assembly.
Conclusion
The MacBook Pro 15″ (Early 2011) offers strong performance upgrades and a robust design. However, Apple’s restrictive design choices, such as the use of proprietary screws and non-user-replaceable batteries, impact repairability. While the machine is reliable in the short term, potential thermal issues and limited upgradability may affect long-term usability.
Also Read : How to Fix LCD Screen Lines on Your Phone: A Step-by-Step Guide